10RMB月不到部署FLASK网站项目(flask+gunicorn+nginx)

it2026-09-26  10

目录

FLASK项目部署一、本地写好一个小项目(一)项目结构(二)代码部分(三)生成requirement.txt文件(四)代码提交到github仓库,便于远程主机获取项目文件 二、腾讯云租用服务器(一)租用服务器(二)重置服务器(三)域名解析(四)防火墙添加规则 三、服务器搭建网站(一)用Xsell7连接服务器(二)更新系统可安装的包列表(三)添加root密码(可选)(四)安装虚拟环境并配置好程序且安装需要的第三库文件(五)设置防火墙(可选)(六)使用Gunicorn运行程序(七)访问服务器(八)使用nginx提供反向代理(九)使用supervisor管理进程实现自动后台运行

FLASK项目部署

一、本地写好一个小项目

(一)项目结构

My_website ┣━ HelloWorld ┃ ┣━ blueprints ┃ ┃ ┗━ main.py ┃ ┣━ static ┃ ┃ ┗━ css ┃ ┃ ┗━ style.css ┃ ┣━ templates ┃ ┃ ┗━ index.html ┃ ┗━ __init__.py ┣━ run.py ┗━ .flaskenv

粗体是文件夹,没有粗体是文件

(二)代码部分

__init__py # __ini__.py from flask import Flask from HelloWorld.blueprints.main import main_bp def create_app(): app = Flask('HelloWorld') app.register_blueprint(main_bp) return app main.py # main.py from flask import Blueprint, render_template main_bp = Blueprint('main', __name__) @main_bp.route('/') def index(): return render_template('index.html') run.py # run.py from HelloWorld import create_app app = create_app() style.css /* style.css */ *{ margin: 0; padding: 0; } body{ padding-top: 20%; background-color: #50514f; display: flex; flex-direction: column; align-items: center; } p.china{ margin-top: 30px; color: white; font-family: 黑体; font-size: 1.5rem; font-weight: lighter; } p.english{ font-size: 1.2rem; font-weight: bold; font-family: 微软雅黑; color: #70c1b3; } index.html {# index.html #} <!DOCTYPE html> <html lang="en"> <head> <meta charset="UTF-8"> <title>你好世界</title> <link rel="stylesheet" href="{{ url_for('static', filename='css/style.css') }}"> </head> <body> <p class="china">你好,你已经部署成功!</p> <p class="english">Wow , congratulation , it work !</p> <p class="china">完善属于你自己的网站吧!</p> <p class="english">Next , complete your own site as you like !</p> <p class="china">希望能留下你的心得收获!</p> <p class="english">Hope to leave your happy expression !</p> </body> </html>

(三)生成requirement.txt文件

$ pip install pipreqs # 进入项目目录 $ cd My_website $ pipreqs ./

由于项目比较小,所以最终生成的requirment.txt文件只包含FLask库 所以在后续开发过程中,如果引进了新的第三方库,也需要更新这个文件

(四)代码提交到github仓库,便于远程主机获取项目文件

二、腾讯云租用服务器

(一)租用服务器

腾讯云 - 产业智变 云启未来

如果你是学生,或者低于25岁,即可享受校园云服务器优惠政策,一个月只需10元左右,需要实名认证,不用审核,都是秒认证的。

学生云服务器_学生云主机_学生云数据库_云+校园特惠套餐 - 腾讯云

选择第二个稍微比第二个好一点。点击购买

活动地区选什么都ok,镜像后面可以换,我加1块钱买了域名,超值。

(二)重置服务器

进入控制台

进入该服务器

选择合适的系统

这里我们使用Ubuntu 18.04.1LTS

点击重置密码

用户名系统默认或者自定义都行,这里用系统默认
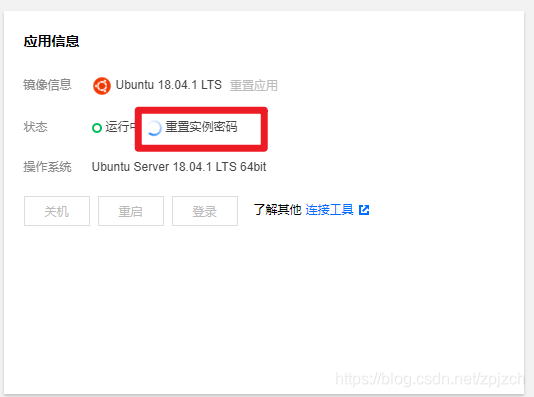
![在这里插入图片描述](https://img-blog.csdnimg.cn/20201022210421720.png?x-oss-process=image/watermark,type_ZmFuZ3poZW5naGVpdGk,shadow_10,text_aHR0cHM6Ly9ibG9nLmNzZG4ubmV0L3pwanpjaA==,size_16,color_FFFFFF,t_70#pic_center)

重置实例密码完成后页面会刷新一下,接下来就是搭建网站了

(三)域名解析

需要实名认证,这次需要身份证的照片,只有认证了才可以域名解析 不过我们可以先添加记录

添加记录

点击 “解析” 点击 “添加记录”

两条记录不同的是,如果你想访问你的网站,可以通过输入两个网址 第一张图是:www.zpjcmm.design 第二张图是:zpjcmm.design

保存完可以看到,两条记录,就等着实名认证可以之后,再用域名访问,我们可以先用ip地址访问我们的网址

(四)防火墙添加规则

三、服务器搭建网站

(一)用Xsell7连接服务器

新建会话

输入名称和主机地址(也就是服务器公网ip地址)

输入用户名和密码

这里的用户名就是在上面重置服务器后用的用户名,如果是系统默认就ubuntu,如果是自定义,就要用自定义的用户名

(二)更新系统可安装的包列表

$ sudo apt update $ sudo apt upgrade

一路回车

(三)添加root密码(可选)

# 添加root管理 $ sudo passwd Enter new UNIX password: Retype new UNIX password: passwd: password updated successfully

(四)安装虚拟环境并配置好程序且安装需要的第三库文件

安装pip $ sudo apt install python3-pip 安装和配置虚拟环境 # 安装虚拟环境 $ sudo pip3 install virtualenv # 安装虚拟环境拓展包 $ sudo pip3 install virtualenvwrapper $ nano ~/.bashrc # .bashrc export WORKON_HOME=$HOME/.virtualenvs export VIRTUALENVWRAPPER_PYTHON=/usr/bin/python3 source /usr/local/bin/virtualenvwrapper.sh

保存文件 ctrl + o :编辑完成 回车:文件名确认 ctrl + x:退出编su

$ bash 创建虚拟环境 $ mkvirtualenv helloworld 克隆项目到服务器 (hell..)$ git clone https://github.com/zpj995380228/helloworld.git 安装所需的第三方库 (hell..)$ cd helloworld/ (hell..)$ pip install -r requirement

(五)设置防火墙(可选)

(hell..)(root)$ ufw allow 22 (hell..)(root)$ ufw allow 80 (hell..)(root)$ ufw allow 8000 (hell..)(root)$ ufw enable

查看防火墙状态

(hell..)(root)$ ufw status

(六)使用Gunicorn运行程序

安装gunicorn (hell..)$ pip install gunicorn 运行程序 (hell..)$ guniicorn -w 4 -b 0.0.0.0:8000 run:app

(七)访问服务器

使用手机或者可以上网的电脑访问你的远程主机的IP地址的8000端口 比如我的就是:106.52.12.24:8000(记得冒号是英文输入状态下的冒号)

(八)使用nginx提供反向代理

(hell..)$ sudo apt install nginx (hell..)$ sudo rm /etc/nginx/site-enabled/default (hell..)$ sudo nano /etc/nginx/site-enabled/helloworld # helloworld server{ listen 80 default_server; server_name _; access_log /var/log/nginx/access.log; error_log /var/log/nginx/error.log; location / { proxy_pass http://127.0.0.1:8000; proxy_redirect off; proxy_set_header Host $host; proxy_set_header X-Real-IP $remote_addr; proxy_set_header X-Forwarded-For $proxy_add_x_forwarded_for; proxy_set_header X-Forwarded-Proto $scheme; } location /static { alias /home/ubuntu/helloworld/HelloWorld/static/ ; expires 30d; } }

每次修改nginx配置文件都需要重启nginix服务

(hell..)$ sudo service nginx restart

运行程序

(hell..)$ gunicorn -w 4 run:app [2020-10-22 07:12:26 +0800] [9935] [INFO] Starting gunicorn 20.0.4 [2020-10-22 07:12:26 +0800] [9935] [INFO] Listening at: http://127.0.0.1:8000 (9935) [2020-10-22 07:12:26 +0800] [9935] [INFO] Using worker: sync [2020-10-22 07:12:26 +0800] [9938] [INFO] Booting worker with pid: 9938 [2020-10-22 07:12:26 +0800] [9939] [INFO] Booting worker with pid: 9939 [2020-10-22 07:12:26 +0800] [9941] [INFO] Booting worker with pid: 9941 [2020-10-22 07:12:26 +0800] [9943] [INFO] Booting worker with pid: 9943

直接访问ip地址

style.css被禁止,查看nginx错误日志

(hell..)$ nano /var/log/nginx/error.log 2020/10/22 07:12:32 [error] 9670#9670: *6 open() "/home/ubuntu/helloworld/HelloWorld/static//css/style.css" failed (13: Permission denied), cli$ 2020/10/22 07:12:39 [error] 9670#9670: *6 open() "/home/ubuntu/helloworld/HelloWorld/static//css/style.css" failed (13: Permission denied), cli$ 2020/10/22 07:17:32 [error] 9670#9670: *10 open() "/home/ubuntu/helloworld/HelloWorld/static//css/style.css" failed (13: Permission denied), cl$ 2020/10/22 07:17:43 [error] 9670#9670: *10 open() "/home/ubuntu/helloworld/HelloWorld/static//css/style.css" failed (13: Permission denied), cl$

权限问题,修改nginx的权限就可以了

(hell..)$ nano /etc/nginx/nginx.conf user www-data; 删除这一行 user root; 换成这一行 ...

再运行程序

(hell..)$ sudo service nginx restart (hell..)$ gunicorn -w 4 run:app [2020-10-22 07:28:31 +0800] [12285] [INFO] Starting gunicorn 20.0.4 [2020-10-22 07:28:31 +0800] [12285] [INFO] Listening at: http://127.0.0.1:8000 (12285) [2020-10-22 07:28:31 +0800] [12285] [INFO] Using worker: sync [2020-10-22 07:28:31 +0800] [12288] [INFO] Booting worker with pid: 12288 [2020-10-22 07:28:31 +0800] [12290] [INFO] Booting worker with pid: 12290 [2020-10-22 07:28:31 +0800] [12292] [INFO] Booting worker with pid: 12292 [2020-10-22 07:28:31 +0800] [12293] [INFO] Booting worker with pid: 12293

(九)使用supervisor管理进程实现自动后台运行

(hell..)$ sudo apt install supervisor (hell..)$ sudo nano /etc/supervisor/conf.d/helloworld.conf [program:helloworld] command=/home/ubuntu/.virtualenvs/helloworld/bin/gunicorn -w 4 run:app directory=/home/ubuntu/helloworld user=root autostart=true autorestart=true stopasgroup=true killasgroup=true (hell..)$ sudo service supervisor restart (hell..)$ sudo supervisorctl helloworld RUNNING pid 16517, uptime 0:00:08 supervisor>

最新回复(0)